


CUTTLEBUG TUTORIAL
This is my first tutorial so I hope all goes well. I'm going to show you how I create a card with 2 different Cuttlebug embossing folders. So lets get started.
This is my first tutorial so I hope all goes well. I'm going to show you how I create a card with 2 different Cuttlebug embossing folders. So lets get started.

Here are the supplies you will need:
- Cuttlebug and both your B-plates
- 2 Cuttlebug embossing folders
- card stock
- Scor-Pal (optional)
Step 1
Cut your card stock to the size you want for your card (I usually cut mine to 4" x 5 1/4" so that there is a bit of a mat when I center the card base on the card front).
Step 2
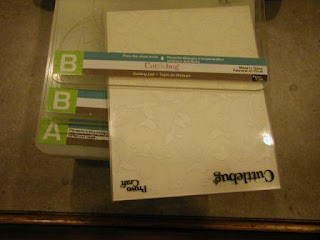
We will be using the following Cuttlebug formula for this :
A-plate, B-plate, embossing folder (with paper in it) and B-plate. (as shown below)
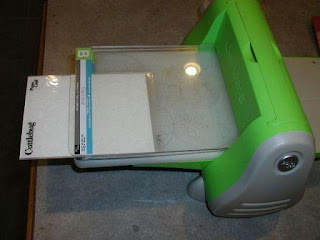
Now put your card stock in the embossing folder and use the recipe from above. I try to line up my embossing folder along the edge of the Cuttlebug so that I can keep my embossing folder as straight as possible. I then put my B plate on top but make sure the part I DON'T want to emboss is sticking out of the plates (as seen in the picture below). Now run it through.
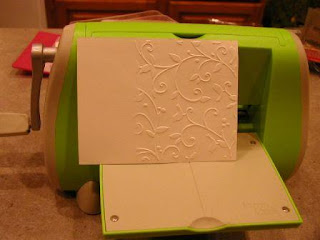
This is what you should have when you take out your card stock.
Step 3
Line up your unembossed side of card stock in the 2nd folder. This probably is the toughest part because you want to make sure the paper is straight.
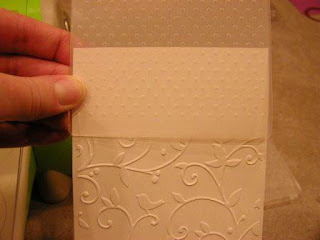
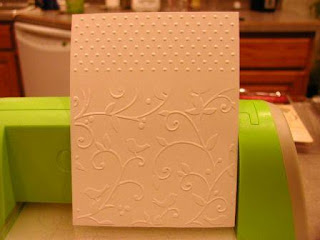
I then run it through my Cuttlebug leaving the extra paper sticking out of the plates like in the previous step. This is what you should have when you take out your card stock.
Step 4 (optional)
Now comes the optional part. You can now use your Scor-Pal to create embossed lines between the 2 different embossed portions. If you want to do this make sure you leave a little space between them when you run them through the Cuttlebug. Then placing the paper embossing side down line it up on your Scor-Pal.
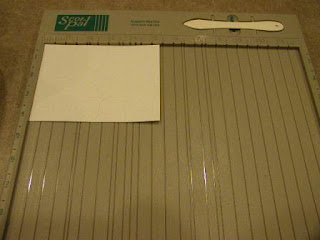 Here is what that looks like when you are done.
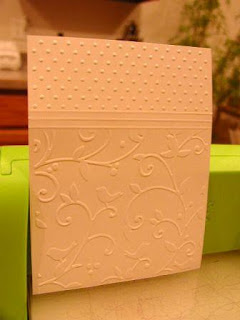
Well, I hope that was simple enough. What did you think? I really enjoyed trying it. If you have any questions let me know. Stay tuned next week I have a theme in mind... Any guesses on what it is? Hope you are having a wonderful weekend - and staying warm. It's been so cold here in Michigan.
Happy Crafting,
Kimmy
Cut your card stock to the size you want for your card (I usually cut mine to 4" x 5 1/4" so that there is a bit of a mat when I center the card base on the card front).
Step 2
We will be using the following Cuttlebug formula for this :
A-plate, B-plate, embossing folder (with paper in it) and B-plate. (as shown below)

Now put your card stock in the embossing folder and use the recipe from above. I try to line up my embossing folder along the edge of the Cuttlebug so that I can keep my embossing folder as straight as possible. I then put my B plate on top but make sure the part I DON'T want to emboss is sticking out of the plates (as seen in the picture below). Now run it through.

This is what you should have when you take out your card stock.

Step 3
Line up your unembossed side of card stock in the 2nd folder. This probably is the toughest part because you want to make sure the paper is straight.

I then run it through my Cuttlebug leaving the extra paper sticking out of the plates like in the previous step. This is what you should have when you take out your card stock.

Step 4 (optional)
Now comes the optional part. You can now use your Scor-Pal to create embossed lines between the 2 different embossed portions. If you want to do this make sure you leave a little space between them when you run them through the Cuttlebug. Then placing the paper embossing side down line it up on your Scor-Pal.
 Here is what that looks like when you are done.
Well, I hope that was simple enough. What did you think? I really enjoyed trying it. If you have any questions let me know. Stay tuned next week I have a theme in mind... Any guesses on what it is? Hope you are having a wonderful weekend - and staying warm. It's been so cold here in Michigan.
Happy Crafting,
Kimmy


